 きー
きーもう、爪とぎで忙しいのに今日はなんなの!?
 くー
くーみゃーチュールみゃー
 はた
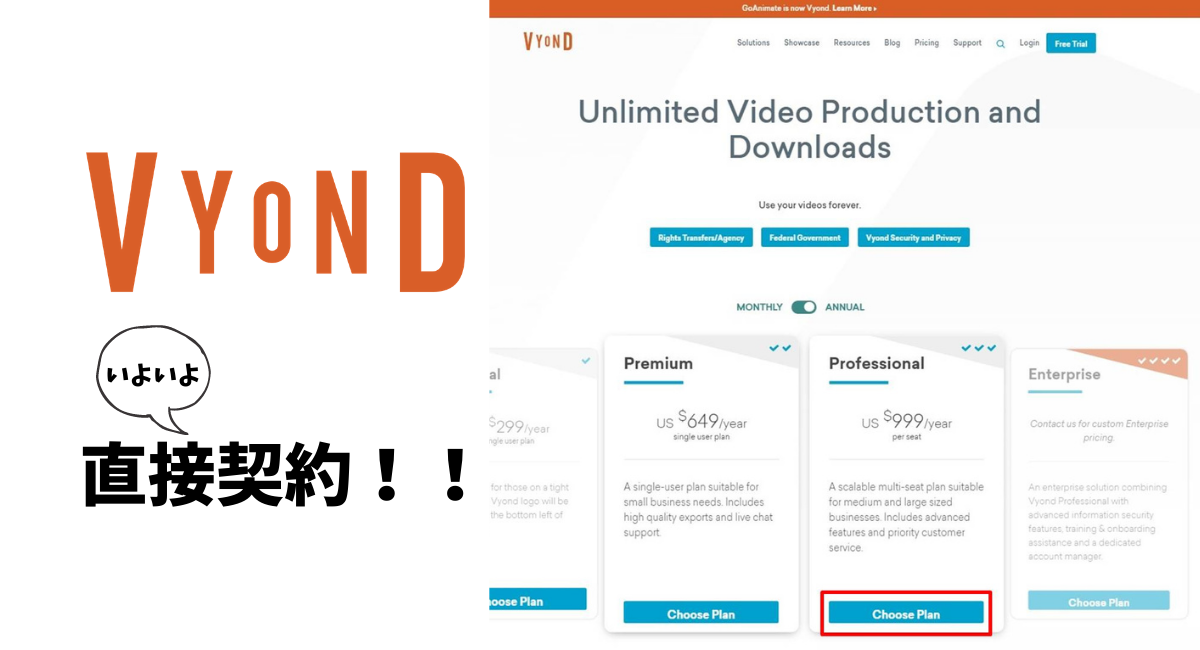
はた今日はいよいよVYONDを直接契約するためにアメリカに挑んじゃうよ!
きーええーーーーーーー!?
くーひーーーーーーーー!?
はたそんなにびびらなくても全然大丈夫だよ。
これまでVYONDに関しての大まかな説明、契約するのにかかる費用など説明してきました。今回はいよいよアメリカのGoAnimateと直接契約する流れについて解説していきます。
おつかれさまです!はた(@hata_vyond)です。こんかいはいよいよGoAnimateとの直接契約です。GoAnimateはアメリカの会社ですが、じっくりやっていけばそんなに難しいことはありませんので安心してください。ではサクッといっちゃいましょう♪
VYONDをGoAnimateで直接契約するまでの道
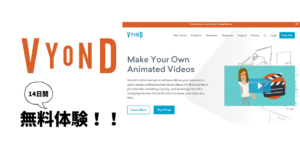
まずはGoAnimateの公式サイトへ
まずはGoAnimateの公式サイトに行きます。
ここで必要になってくるのがVYONDの無料アカウントです。14日間無料体験するためのアカウントですね。こちらの記事で詳しく説明しています。無料アカウントをお持ちでない方はまず取得してみてください。
右上のメニューをクリック
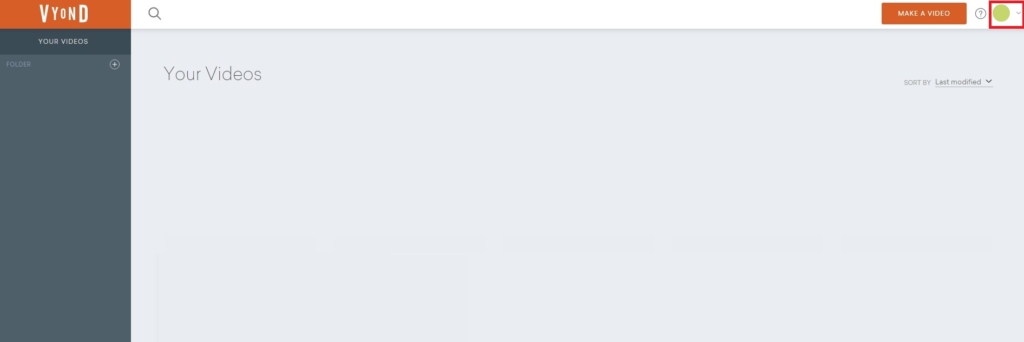
ログイン後に右上のメニューをクリックしましょう。
Upgrade Nowをクリック
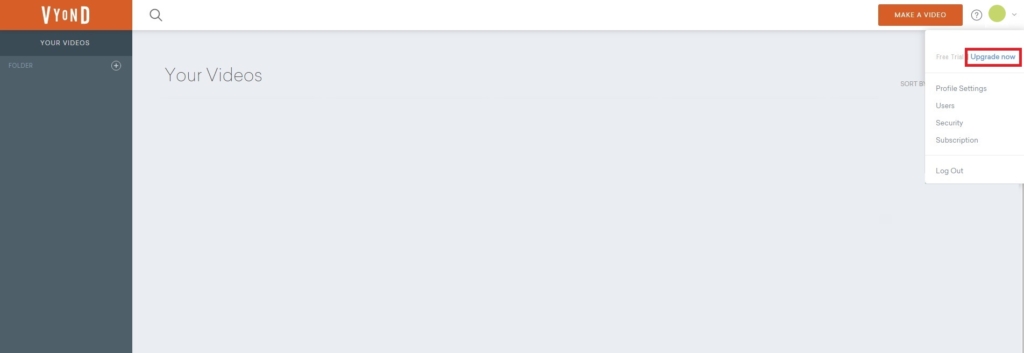
メニューから「Upgrade Now」をクリックしましょう。そうすると次の画面のように『Price』の画面に移動します。
プランを選択
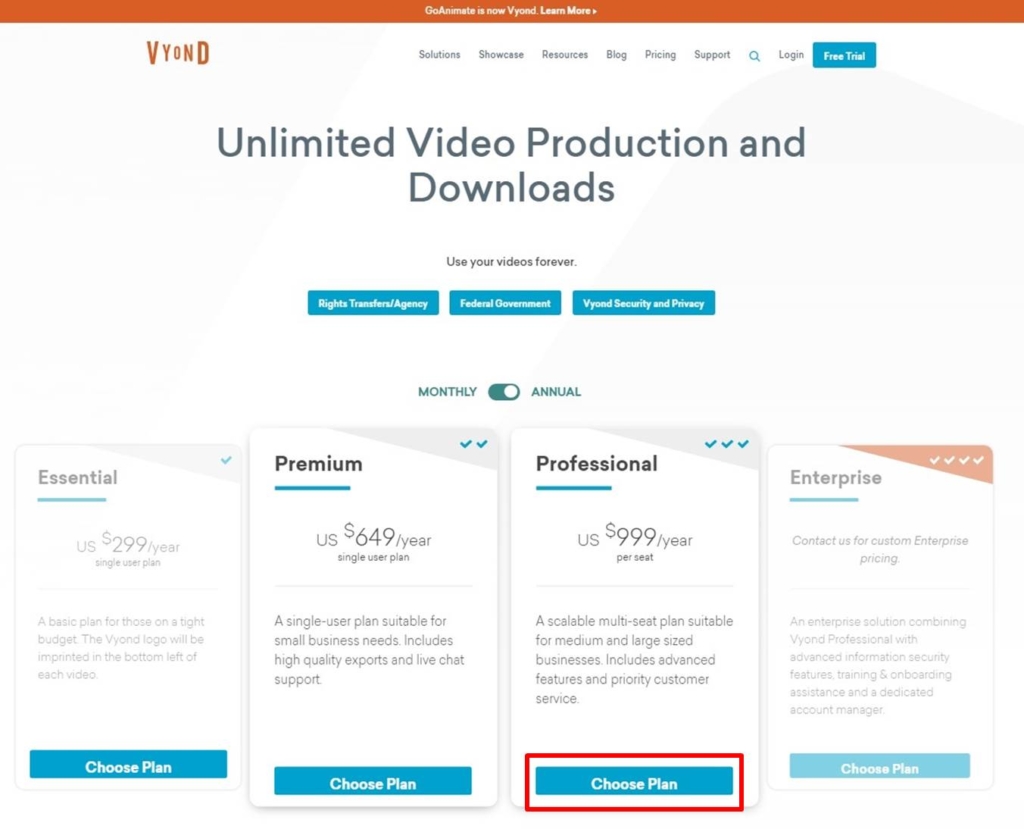
今回はProfessionalコースの年額プランを購入するという事で説明していきます。なのでこちらの赤い部分をクリックします。そうしたら『購入画面』に移動します。
各プランや契約コース(1年コース、3ヶ月コース、1ヶ月コース)に関してはこちらの記事の【VYONDをアメリカのGoAnimateで契約する場合】のところで解説しています。合わせてお読みください。各プランのメリットやデメリットについても書いてます。

支払いプランとライセンスの数を選択
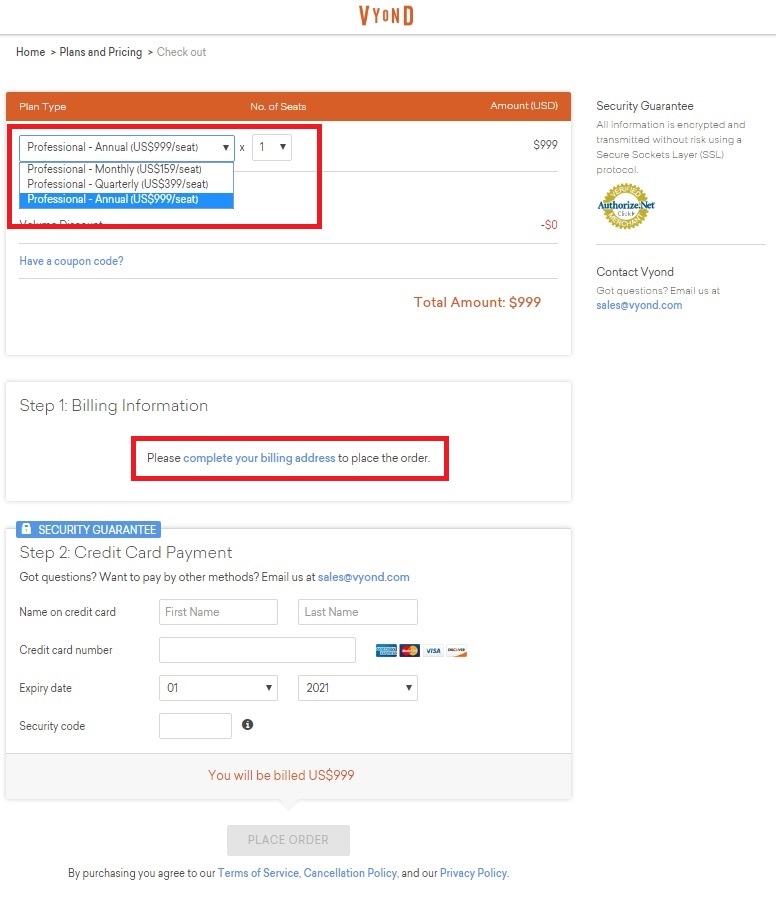
「Pran Type」から支払いプランを選びます。
- Annual(1年)
- Monthly(1ヶ月)
- Quarterly(3ヶ月)
です。その横の「No.of Seats」はライセンスの個数になります。必要な数だけ選択してください。通常、個人で使用するのであればライセンスは1つで良いと思います。選択が終わりましたら「Step1:Billing Information(支払情報)」の入力に進みます。「complete your billing address」をクリックしましょう。
※別記事で書く予定ですが、ライセンスは自分専用です。ライセンスを貸し出して他の人に作業してもらうことはVYONDの規約違反となります。絶対にやめてください。
はたこの件に関しましては理由も含めて別記事でじっくりと説明しますね。
支払情報の入力
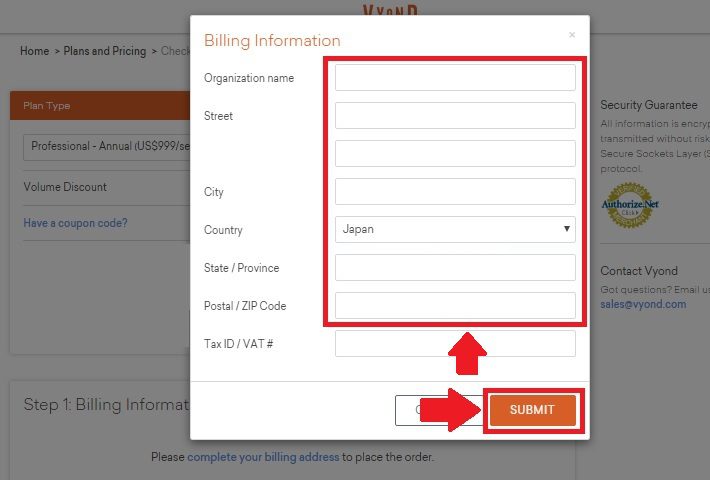
支払情報の入力をしていきます。英語表記なので難しく感じるかもしれませんがわかりやすくまとめてみました。
- Organization name → 会社名またはご自身のお名前
- Street → 市
- Country → 国名
- State/Province → 都道府県
- Postal/ZIP Code → 郵便番号
これを英語で記入していきます。こちらのサイトは日本の住所を英語表記に一発で変換してくれますので大変便利です。(新規タブで開きます)
支払情報の入力が終わりましたら「Submit」をクリックしましょう。
クレジットカード情報を入力
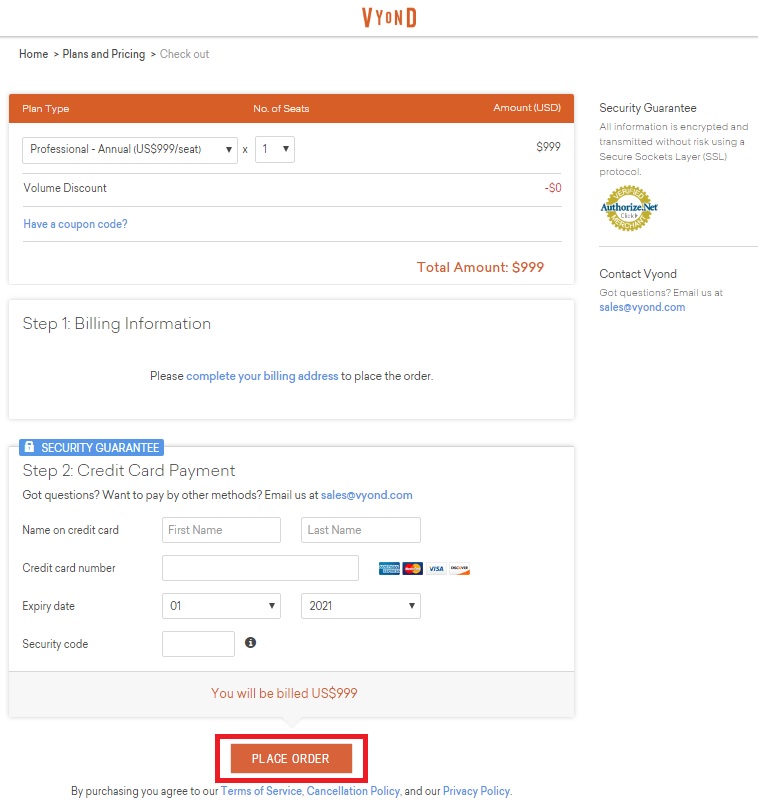
次に「Step2:Credit Card Payment」に進みクレジットカード情報を登録していきます。ちなみに対応しているクレジットカード(デビットカードも使用できます)ブランドは
- VISA
- MasterCard
- AmericanExpress
- DISCOVER
になります。PayPalも利用可能です。
クレジットカード情報ですが以下を参考にしてください。
- Name on credit card → クレジットカードに登録している名前
- Credit number → カード番号
- Expiry date → 有効期限
- Security code → セキュリティコード
情報の入力が完了すると「PLACE ORDER」がクリックできるようになりますのでクリックしてください。
以上で購入完了です!お疲れさまでした!購入後は登録したメールアドレスに「支払い完了メール」が届きますので忘れないように確認しましょう。
まとめ
きー思ったより大変だったわ…
くーそう?思ったよりサクッといけたにゃ!
はた2人ともお疲れさまでした。チュールあげるね!
きーにゃー!
くーぎゃーーーー!チュールチュール!!
英語のサイトに情報を入力していくのは初めての人は大変だったと思います。実際にやってみたらいい経験になりますし、次から英語サイトへの抵抗も少なくなってきますよ。もしわからないことがございましたら問い合わせフォームまたはTwitterのDMより質問してください。1人で悩まないでくださいね。
最後までお読みいただきありがとうございました!
コメント